Saturday, June 2, 2012

Borough Market Salad

Greetings from London, dear readers! I'm sorry it's taken me quite so long to write a new post - but somehow being a tourist has gotten in the way of blogging about delicious food. I've been in London for nearly three weeks now, so that makes me almost a local, right? Well, I'm enough of a local that today I went to one of London's finest food markets, the Borough Market, and loaded up on fresh, local ingredients... including English strawberries, asparagus, salad greens, a cucumber (which at home would be called an English cucumber, but here it was just called a "Cuc"), darjeeling tea, focaccia bread, plump dried cranberries and honeyed almonds, fourme d'Ambert blue cheese, and English cider... unfortunately the only reason I stopped there was because I ran out of cash and then it seemed like a good idea to go home.

The strawberries are in season in England now and they are juicy and sweet. I would love to make strawberry shortcake with them, or scones with clotted cream and fresh strawberries. It would be a bit too challenging for me to make scones or shortcake today though (without any of the ingredients or some of the proper equipment), so both you and I, dear readers, will have to wait until I return to Toronto (when hopefully Ontario strarwberries are in season) for those recipes. Going for afternoon tea here has motivated me to learn how to make the perfect scone - not that my blueberry lemon scones aren't delicious, but I want to make plain, light scones that are meant to be served with clotted cream and jam.

Back to the Borough Market - and the Borough Market Salad I've created with my fine, fresh ingredients. The Borough Market is located right by London Bridge - and according to their website, there have been food markets in this area since 1014. The market has over 100 stalls, which range from fruit and veg, to bakers and butchers. I walked around the market at least three times before I was ready to start buying anything. I had to study each produce stand to decide where to buy my fruit and veg (the prices were not the same across the market), and look at all the cheese stands, and sample olive oils that I didn't buy, and inspect the baked goods and breads at all the bakeries so that I knew I was making the most informed decisions. I went to the market with a vague idea of some ingredients to buy, but luckily I found more than enough inspiration across the stands. Here's my salad to prove to you just how well I did at the market:

The Recipe:

Note: this recipe is a rough guideline only - with salads, I'd say it's not important to follow strict measures - just go with what you like!

Mixed salad greens
(English) cucumber, chopped
handful of dried cranberries
handful of honeyed almonds
Fourme d'Ambert (or any blue cheese of your choice), crumbled
Olive oil
Balsamic vinegar
Salt and pepper, to taste

Focaccia bread, sliced, to serve on the side

1. Wash lettuce thoroughly and dry. Top with cucumber, cranberries, and almonds.
2. In a small bowl, whisk together olive oil and balsamic vinegar. Add salt and pepper to taste, if desired. Drizzle dressing over salad and toss together lightly.
3. Serve with focaccia bread on the side and a local English cider.

At the produce stand where I bought my mixed salad greens, there were giant bins of about six different types of greens - none of them labeled. So I picked a mix of them, taking more of the ones I thought would taste best, but making sure to get some of them all to try.

When I went to buy the cheese, I originally had planned to get an English Stilton. Somehow I ended up with a French cheese instead. To be honest, I haven't really acquired a taste for any type of blue cheese yet, and so I asked the man for the "least strong" blue. He obviously laughed at me. He let me sample some of the cheeses though, and I decided on the Fourme d'Ambert. I find that crumbled into a salad of flavourful greens, complimented by the sweet cranberries and almonds, the cheese is just right.


Happy Eating!

Caroline

Monday, April 30, 2012

Arugula Pesto Pizza


I'm not sure how it is already May (or will be in an hour and a half) and we your friendly cooks/bakers at scrambledeggsetc have not done a post on pizza. Pizza is one of my favourite foods. I love how versatile pizza can be - as this here recipe will exemplify.

Just a few weeks ago, I went out for dinner at the recently opened Terroni Yonge St restaurant with some of my girlfriends, for, you guessed it - pizza. I'm not intending to give a review of the restaurant here, but I will say that I liked the new space. I had been to the Yonge and St Clair location lots of times before it closed since it was always a convenient meeting spot for good, but overpriced Italian food. I chose a pizza called "La Pecuri" that was topped with tomato sauce, mozzarella, goat cheese, sundried tomato, arugula, and parmigiano (I didn't remember that there were that many cheeses on my pizza but I just looked up the menu - no wonder it was so delicious!). The pizza came covered in a thick layer of arugula - and since that pizza, I've been craving arugula.

Other names for arugula include: rocket, roquette, or rucola
Arugula has a rich peppery taste. You're most likely to see arugula in salad, but it goes really well on pizza. When making pizza with arugula, you want to add it just before the pizza is finished cooking, or after it comes out of the oven to avoid wilting. Or - create your own version of an arugula pesto, like I did with this recipe. I've also added it to pasta, tossed with olive oil, tomatoes, roasted red peppers, and black olives. Arugula may be my new favourite leafy green. Let's get back to pizza though...

I discovered this recipe through Huffington Post but the recipe is based off of one from Giada De Laurentiis. As you may recall, she provided us with our recipe for the most amazing tomato sauce that we used in our Italian Feast. If you haven't done so yet, go back and try the tomato sauce recipe - I guarantee you won't regret it. I had a good feeling that Giada's recipe for Arugula Pesto Pizza would be delicious - and so it was.

I have to admit before I post the recipe that I used a store bought frozen pizza dough for my crust. I have every intention of making pizza dough from scratch for a post in the near future (I'm not lying when I say pizza is my favourite food) - but by using a store bought pizza dough, you're able to save on time and the results are still delicious!

The Recipe:

1/2 cup ricotta cheese (I used light ricotta)
2 garlic cloves, crushed
1/4 tsp sea salt
1/4 tsp freshly ground black pepper
1 1/2 cups grated mozzarella cheese
1 packed cup arugula
Flour, for dusting
1 1 lb store bought pizza dough
Olive oil, for drizzling
1/2 pint cherry tomatoes, sliced

1. In a food processor or blender, combine ricotta cheese, crushed garlic, salt and pepper. Blend until smooth.
2. Add the mozzarella and arugula. Pulse until just combined, but still chunky. Note: since I used a blender rather than a food processor, I chopped up my arugula before adding it into the blender, since I didn't really trust my blender's ability to do it for me.
3. On a lightly floured surface, roll out pizza dough. I cut the ball of dough in half first, to create 2 10-inch pizzas. Transfer dough to prepared baking sheet and drizzle with olive oil.
4. Spread the ricotta mixture onto the pizza dough, leaving a 1-inch border. Arrange the sliced tomatoes on top.
5. Follow the instructions for baking the pizza dough: I baked my pizzas for about 15 minutes each, at 425 degrees. Depending on how thick your crust is, you may need them to bake for more or less time. Pizza is ready when the crust has browned around the edges.
6. Remove pizza from oven and allow to cool a few minutes before cutting and serving.

The arugula pesto on this pizza is cheesy and full of flavour from the arugula. The tomatoes compliment it nicely, but you could also try adding red peppers. I would avoid any salty toppings like olives or sundried tomatoes.

If you love pizza as much as I do, but you are not a huge fan of arugula, this may be a good way to try it out! Eat this pizza as a main, or cut it into small wedges and serve as an appetizer.


Happy Eating!

Caroline

Sunday, April 22, 2012

Oatmeal Chocolate Chip Muffins

Have you ever had the perfect oatmeal chocolate chip muffin? I'm talking about a muffin that isn't dry but has a crisp muffin top. It has a perfect ratio of chocolate chips to dough. It doesn't leave you feeling like you just ate a mini cake - but at the same time, it's not really the type of muffin you'd want to eat for breakfast. If you haven't had this perfect muffin yet, then yes you're missing out - but I have the solution for you, right here:


Just look at those beautiful chocolate chips! I've already covered the most important reasons for why we would choose the combination of oatmeal chocolate over oatmeal raisin in our recipe for Oatmeal Chocolate Chip Cookies. But maybe now you're wondering why I would post about a muffin that is quite similar to a cookie we made not that long ago? Well, these muffins are - dare I say it, easier to make than cookies.

The best bakery oatmeal chocolate chip muffins I've ever had came from Card's Bakery in Kingston, Ontario. We served these muffins at Common Ground at Queen's, and they were always a popular choice. I was reminiscing about how I haven't had such a good oatmeal chocolate chip muffin since leaving Queen's - and that's what inspired me to bake my own! I'm not promising that these taste exactly like the Card's muffins, but they are definitely worth a try!

The Recipe:
1 1/4 cups quick cooking oats
1 1/4 cups milk
1 egg
1/3-1/2 cup vegetable oil*
1/2 cup brown sugar
3/4 cup semisweet chocolate chips
1 1/4 cups flour (I used 1/2 cup whole wheat and 3/4 cup all-purpose)
1/2 tsp cinnamon
4 tsp baking powder
1/2 tsp salt

1. Combine oats and milk and allow to stand for 15 minutes. I combined my oats and milk in our 4-cup Pyrex measuring cup and then added the other wet ingredients to this measuring cup later, rather than using an additional bowl. So if you have a giant measuring cup too, I recommend taking this route as well - if not, combine oats and milk into a medium sized bowl and let stand 15 minutes.
2. Preheat oven to 400 degrees and line standard muffin tray with 12 papers. 
3. In a large bowl, combine flour, cinnamon, baking powder and salt. 
4. Stir egg, oil, brown sugar and chocolate chips into the oat and milk mixture.
5. Pour oat mixture over flour mixture and stir until all the flour mixture is incorporated, but like always with muffins, avoid over-mixing. 
6. Fill each cup of the muffin tray about 3/4 full. Bake at 400 degrees for 20 to 22 minutes, or until cake tester comes out clean. Allow to cool 10 minutes before transferring from muffin tray to wire rack to cool completely. 

*The recipe I used calls for 1/2 cup of oil - which is how much I used. I found that the muffins are too oily though - so I recommend starting with 1/3 cup and then if when you are stirring the oat and flour mixtures together, you find the batter is too dry, you can always add a bit more oil. 

This is my 4-cup measuring cup that served as my second bowl for this
recipe - I'm all for cutting down on dishes for the clean up after!

And see how nicely you can pour your oat mixture into the flour mixture
when you're pouring from a giant measuring cup?

Here is your perfect chance to make the perfect oatmeal chocolate chip muffin. Trust me, these muffins taste just as good as they look. Actually, you may want to double this recipe, because realistically, how long will 12 muffins even last? I baked these muffins on Saturday (because weekend baking is the best kind of baking) and they're already disappearing quickly! I'm going to share my exciting news with your right now dear readers (if you've made it this far): I baked these muffins right after I booked my flight to London! I'm not leaving for a few weeks, but I'll be away for nearly a month - so maybe start to look forward to a post on tea and crumpets? Or some other British delicacies? 


Happy Eating!

Caroline

Tuesday, April 17, 2012

Lemon Poppy Seed Loaf


Lemon and poppy seeds go together perfectly - especially in loaf form. You wouldn't be nearly as excited if I told you this was a post about simply a Lemon Loaf, right dear readers? And I'm sure a Poppy Seed Loaf would seem like it was missing a key citrus-y flavour. But Lemon Poppy Seed loaf - now that's a classic. The lemon is fresh but sweet. The poppy seeds can be a bit annoying, say if you spill a tablespoon when you're making your loaf (did you know that there are 3,300 poppy seeds in ONE gram?) - but they add a hint of flavour and texture that you'll want in your loaf.

Similar to my recipe for chocolate chip banana bread, this loaf is simple to make with results that won't disappoint. You may be tempted to call this lemon poppy seed loaf a "cake", since it is light and sweet (and not very bread-like at all) - but I feel like the word "cake" is too often associated with birthdays or other special occasions, while this recipe is good to make and eat at any time.

The Recipe:

1/2 cup of butter, at room temperature
1 cup granulated sugar
2 eggs
1 1/2 cups all purpose flour
3 tbsp poppy seeds
1 tbsp grated lemon rind
1 tsp baking powder
1/4 tsp salt
1/2 cup milk

Lemon Syrup:
1/4 cup granulated sugar
1 tsp grated lemon rind
1/4 cup lemon juice

1. In large bowl, beat together butter and sugar until light and fluffy. Beat in eggs, one at a time.
2. In separate bowl, whisk together flour, poppy seeds, lemon rind, baking powder and salt. Note for grating the lemon rind: if you are using a grater with multiple sizes, smaller is better - you won't want big chunks of lemon rind in your loaf! I used the rind of one big lemon and it was enough for the 1 tablespoon for the loaf and the 1 teaspoon for the syrup.
3. Stir flour mixture into butter mixture alternately with milk, making 3 additions of the flour mixture and 2 of milk.
4. Spread into greased loaf pan and bake in preheated oven at 325 degrees for one hour, or until cake tester in centre comes out clean.
5. Lemon Syrup: in saucepan, warm together sugar, lemon rind and lemon juice until the sugar has dissolved into the lemon juice. With a skewer or toothpick, pierce hot loaf so that you've almost reached the bottom of the loaf. Pour lemon syrup over the loaf.
6. Let loaf cool in pan for 30 minutes. Turn out onto rack and let cool completely.

Before adding the lemon syrup to the loaf, pierce it with a toothpick to help the syrup sink in (see picture below). This loaf isn't overly sweet, and so the syrup provides the sweetness. You could make the loaf without the addition of the lemon syrup - but it adds such a nice glaze that seeps deliciously throughout the cake, I mean, loaf...


One warning: be careful not to let any poppy seeds get stuck in your teeth when enjoying this loaf!
Happy Eating!

Caroline

Saturday, April 7, 2012

Easter Egg Nests


It is a truth universally acknowledged that Mini Eggs are the best Easter chocolate and although you can now buy Mini Eggs all year round, there really is no better time to eat Mini Eggs than Easter. I took it upon myself to find a recipe for an Easter treat that would use Mini Eggs, be visually pleasing - and of course, taste delicious. The result: mini Easter Egg Nests.

The most challenging part of this recipe is not eating all your Mini Eggs before you use them for the nests. Otherwise, all you need is some basic ingredients and enough space in your fridge to allow these no-bake treats to cool.


The Recipe:

4 oz of chocolate, chopped
2 tbsp butter
1 tbsp corn syrup*
1 cup Rice Krispies cereal
30 Mini Eggs

1. Line a muffin tray with 10 muffin papers and set aside.
2. Melt the chocolate, butter and corn syrup together. To melt chocolate, it is best to use a double boiler or heatproof bowl over a pan of gently simmering water. Stir while the chocolate melts to a smooth consistency.
3. Once chocolate has melted, remove from heat and add the Rice Krispies. Stir until all the cereal is coated.
4. Spoon chocolate Rice Krispie mixture into prepared muffin tray, pushing it down with a spoon to form a "nest" shape. Top nest with 3 mini eggs.
5. Once all the nests are prepared, refrigerate for at least one hour.
Makes approximately 10 Easter Egg Nests.

* I'm not 100% sure if the corn syrup was necessary. I based this recipe off of a recipe I found on the BBC that called for "golden syrup" - which I googled and discovered is an inverted sugar syrup that is popular in the UK and more difficult to find in Canada... especially on Good Friday when most grocery stores are closed. I think you could make these treats without the corn syrup and just make sure you stir the chocolate and butter continuously so it does not harden until you're ready to put the nests in the fridge.


On another note, the original recipe called for Corn Flakes instead of a crispy rice cereal - but I had Rice Krispies on hand and decided to substitute. I think I made the right decision - but these would still work well with Corn Flakes!

Making these Mini Easter Egg Nests reminded me of making Rice Krispie Squares - but the chocolate is so much easier to handle than melted marshmallows are (it's a lot less sticky and a lot easier to form into nest shapes). I probably don't also need to tell you that these taste delicious - the Mini Eggs plus chocolate probably gave that away from the start - but if you remember the chocolate bar Nestle Crunch, these taste similar to that!

Once your nests are completely cooled, you'll probably want to take them outside for a photoshoot, like I did. Just ignore any weird looks from your neighbours and go to it! They look best in trees.


The only thing missing from these adorable little Easter Egg Nests...? That's easy - "Put a bird on it!"

Happy Easter!

Caroline

Thursday, March 29, 2012

Blueberry Yogurt Muffins


Those of you out there who know me well may be aware that I am a bit indecisive from time to time... So when I decided to bake muffins the other day, it took a lot of rummaging through the cupboard and freezer and sifting through far too many recipes to make up my mind. The wonderful thing about muffins is there really are so many kinds you can make - and I debated between banana muffins, banana chocolate chip, banana crumb topping... until I came across the last container of frozen wild blueberries in our freezer. That set me searching for blueberry muffin recipes. I scanned through quite a few cake-y looking blueberry muffin recipes, but I was searching for something healthier. This recipe comes from Canadian Living, but I've made a few adaptations. As you may recall, my recipe for apple oat muffins also uses yogurt, and they are delicious. When I saw that this recipe used yogurt, combined with the orange, I was finally able to make a decision.

One important tip for making muffins: generally, you combine the dry ingredients in one bowl and then the wet in a separate bowl, and then pour the wet ingredients into the dry. When you add the two together, be careful not to over-mix - stir until just incorporated, and that's it! This will make your muffins lighter.

THE RECIPE:
1 cup all-purpose white flour
1 cup all-purpose whole wheat flour
3/4 cup granulated sugar
1 tbsp baking powder
1 tsp baking soda
1/2 tsp salt
1/2 tsp cinnamon
2 eggs
1 cup plain yogurt
1 tbsp grated orange rind
1/4 cup orange juice
1/4 cup vegetable oil
1 tsp vanilla extract
1 to 1 1/2 cups blueberries, fresh or frozen

1. In large bowl, sift together flours, sugar, baking powder, baking soda, salt and cinnamon.
2. In separate bowl, whisk together eggs, yogurt, orange rind, orange juice, vegetable oil and vanilla extract. Pour over dry ingredients. Sprinkle with blueberries. Stir until just incorporated.
3. Spoon into paper-lined or greased muffin cups, filling almost to top. Bake at 375 degree oven for 25 minutes, or until tops are golden. Let cool in pan on rack for 2 minutes. Transfer to rack and let cool completely.

To "zest" my orange for the orange rind, I used the small side of a grater, since I don't have a zester, and it worked just fine. If you also don't have a zester, make sure you do use a small grater setting, because you don't want the rind pieces to be too big. And if you do have a zester... you should probably lend it to me.


If using frozen blueberries, keep them frozen until the last minute. This will stop their colour from running.


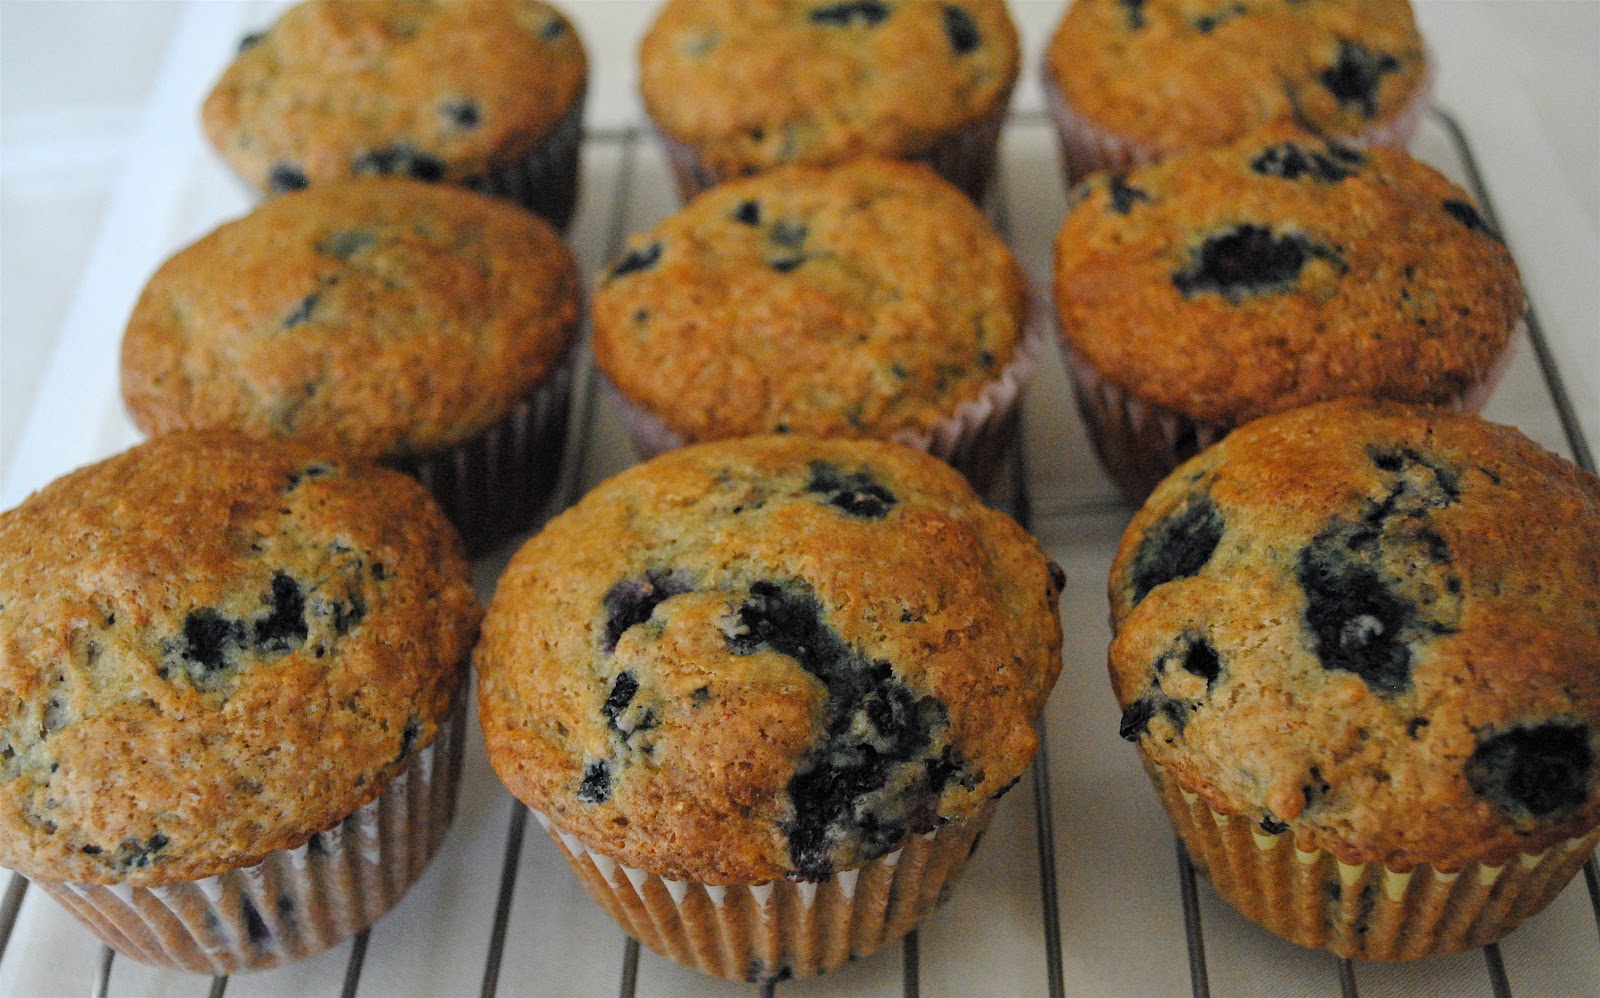
This recipe is quick and easy - unlike me when it comes to making a decision... So I won't tell you how long it took me to decide on making these muffins (because that's a bit embarrassing)... but I will tell you that I made the right decision. See for yourself.


Happy Muffin-Making!

Caroline

Thursday, March 22, 2012

Oatmeal Chocolate Chip Cookies


There's something to be said about oatmeal chocolate chip cookies. Actually I have a few somethings to say.

1 cup of chocolate chips = 1 mug
of chocolate chips...
First of all - why yes you could make oatmeal raisin cookies - but then they wouldn't have any chocolate in them! I've heard the bold statement before that anything that can be made with raisins would taste better with chocolate chips instead... and although I'm not about to test this theory on everything, with oatmeal cookies, I may have to agree...

Secondly, oatmeal chocolate chip cookies have more texture than regular chocolate chip cookies. I'm not trying to knock on chocolate chip cookies - but there's just something a little bit extra special about oatmeal in a cookie.

Another advantage to baking oatmeal cookies that I discovered while growing up: my dad really likes to make oatmeal, or porridge, for breakfast every morning in the winter. And growing up, I wasn't the biggest fan of porridge... so by using oats in cookies, I was really trying to use up all the oats so there wouldn't be any left for breakfast... well that never really worked out for me since we just bought more... But on the plus side, I do like porridge now - and I've become a bit of an expert on oatmeal cookies over the years too!

Finally - I don't know if it's just me, but whenever I bake oatmeal chocolate chip cookies, everyone seems to tell me that this is their favourite type of cookie. This recipe comes from my friend Kaili (who also provided me with the recipe for Mac and Cheese - I love when friends share their recipes with me!) It is a classic oatmeal chocolate chip cookie - just the right amount of chewiness, oats, and of course, chocolate chips!

The Recipe:

1 cup of butter, softened
1 cup brown sugar
1/2 cup white sugar
2 eggs
2 teaspoons vanilla extract
1 1/4 cups all-purpose flour
1/2 teaspoon baking soda
1/2 teaspoon salt
3 cups quick-cooking oats
1 cup semisweet chocolate chips

1. Preheat oven to 325 degrees and line cookie trays with parchment paper.
2. In large bowl, cream together butter and sugars until smooth. Beat in eggs one at a time, then stir in vanilla.
3. In a separate bowl, combine the flour, baking soda and salt. Stir flour mixture into creamed mixture until just blended.
4. Stir in the oats and chocolate chips.
5. Drop by heaping spoonful onto baking sheets.
The "Action" Shot
6. Bake for 12 minutes. Allow cookies to cool 5 minutes before transferring to a wire rack to cool completely.
Makes 3 1/2 to 4 dozen cookies (depending on size).


The question that may be crossing your minds now, dear readers, is what is the difference between these oatmeal chocolate chip cookies and Oh-So-Good cookies? Yes, oh-so-good cookies have Skor bits, which is undeniably delicious - but they have a much lower ratio of oats and therefore can't quite be called an oatmeal cookie. No questions about whether this recipe is in fact to make some very tasty oatmeal cookies.

One problem I've had time and time again with oatmeal cookies is that they will go flat. They may come out of the oven risen nicely - and within a few minutes of cooling, they've suddenly flattened to the tray. So how to avoid flat oatmeal cookies? Don't over-mix your dough once the eggs have been added in. As you'll see, some of our cookies turned out a bit flat - but I blame that on the mix master... and hey, at least flat cookies stack nicely!


These cookies are easy to make and such a classic... so what are you waiting for?

Happy Baking!

Caroline